Showing posts with label Photography. Show all posts

Sunday, January 18, 2009

White Balance for dummies

WB – White Balance is an art unknown to many beginning and amateur photographers. Now a days digital cameras are advanced enough to make “best guess estimate” on what kind of light is being captured and adjust the picture accordingly. Below is an example of the “best guess estimate” taken of my wife at a supermarket yesterday

www.bestnycphoto.com 

As you can see, she’s holding a set of grey cards, you can also tell the image has a yellow tint. These cards are used as reference points to set the correct WB during post processing (can also be set as “Custom WB” in the camera itself). The resulting image is now properly white balanced.

IMG_3983 

In Adobe Lightroom, use the “White Balance Selector” tool to pick a neutral shade (a.k.a the grey card).

Once the ‘calibration image’ is captured for a given light environment, you can use it to color correct the remaining images in that batch.

Wednesday, January 14, 2009

Thoughts on equipment for traveling

I have recently realized how my humble collection of techno-geeky photographic equipment has grown above and beyond anything I could have imagined just several years ago. This awakening came over me when I had to return a recently purchased photo backpack in favor of the “extra large” backpack at B&H.

Not to show off what’s in the backpack (because anybody with enough dough can purchase the same set and having spent six grand on lenses does not make anyone a good photographer) I just want to list the items to give you an idea of equipment I haul around to weddings and other photo shoots:

  • Canon 5D Body with Vertical Grip
  • Canon 24-70 2.8 Lens
  • Canon 70-200 2.8 IS Lens
  • Canon 50 1.8 Lens
  • Canon 15 2.8 Lens
  • Canon 100 2.8 Macro Lens
  • Canon 17-40  Lens
  • 2 Canon Flashes
  • EEEPC (covered in a post below)
  • Batteries, Cables, Chargers, Card Reader, External HD for backups  ….

As you, avid photographers can imagine, this arsenal of lenses and electronics weights close to a small elephant. Although all of this equipment fits into the extra large backpack, traveling with this small elephant on your back in exhaustive and that’s where  the challenge of picking the right stuff comes in.

To be honest, it took me a very long time to find the right recipe for what to take on the road. Naturally, I want to bring all my toys with me but practically, I needed a good range of lenses to get me through the vacation without killing my  back. It’s also worth noticing that one of the Canon 5D’s caveats is that it does not have a built in flash – this means that I always carry an external speedlight.

So … to make the long story short, through experimentation of trial and error, I found the best equipment to haul around town, or bring overseas, is:

  • Canon 5D Body without Vertical Grip
  • Canon 24-70 2.8 Lens
  • Canon 70-200 2.8 IS Lens
  • Canon 580 EX  Flash
  • Batteries, Chargers, Card Reader, Cables

… and miracously, all of  this fits into my smaller slingback bag. When traveling oversees, the EEEPC will prove to be a savior (this, I have yet to test) for backups, quick editing, blogging and communications when on the road.

Your friend and student of life

S.

Sunday, December 28, 2008

Maternity Photoshoot

Recently I had the honor to photograph a couple in their last trimester, practically several week before the delivery date. These photoshoots precede infant and child photoshoots and most couples miss the opportunity to document this unique stage of their life.

Naturally, most of the photographs are intimate and private (hence I fully transfer the ownership of these images to my clients) but here’s one I was allowed to share with you.

IMG_3147

Friday, December 19, 2008

Taking good pictures in the snow

Every photographer who has tried taking pictures in the snow is aware of the Problem: subjects appear underexposed (darker) than they really are. The reason this is happening has to do with the way cameras evaluate light (via internal reflective sensors). A camera evaluates the frame, determines the amount of bright white snow (highlights) and decides to expose for neutral gray by darkening the shot. Solution: help your camera by setting the exposure to overexpose by 1 stop.

DSC_0138

Sunday, December 14, 2008

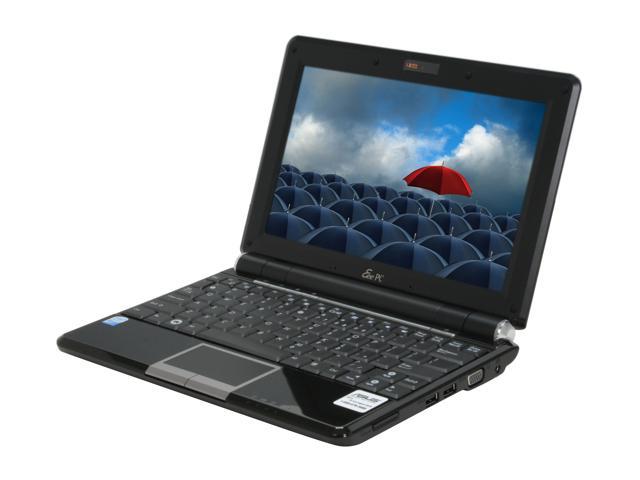
New Toy – Asus EEE PC 1000 Netbook

This weekend, I am all into my new toy. It arrived on Friday, I’ve replaced the RAM chip and reinstalled the OS to go with fast and reliable Windows XP – now its all play!

This is a pretty low end machine with a sluggish processor and slow 40GB SSD but for what I need (travel, on-location basic image processing and backup, VOIP, email, blogging, browsing, etc) its perfect.

Saturday, November 22, 2008

Setting up for a maternity shoot

Today, we went over to our friends home to have some fine omelet and get infused with ideas for a maternity shoot I’ll be doing in two weeks. Here’s some of my thoughts … illustrated.

IMG_1617

IMG_1628

Sunday, November 16, 2008

Wedding of Anthony and Karen

This weekend I was hired by PhotoFXStudio to provide photojournalistic coverage of a beautiful wedding in New Jersey. Here is a sample of my work from that event:

Best Wedding Photographer

Best Wedding Photographer

Best Wedding Photographer

Best Wedding Photographer

Best Wedding Photographer

Best Wedding Photographer

Best Wedding Photographer

Best Wedding Photographer

Best Wedding Photographer

Note: Copyright and reproduction rights belong to PhotoFXStudio.

Sunday, November 9, 2008

Aidan – 12 Weeks Old

Last week I had the honor to professionally photograph my friends 12 week old son Aidan. Overall, we’ve captured a range of emotions but I personally am drawn to this particular photograph. I am convinced that different viewers will interpret it individually but I love the desire, strength and ambition that’s portrayed here.

Tuesday, October 21, 2008

Is B&W Dead?

So many cameras these days generate high quality color pictures that b&w photographs are now almost extinct. Is death the future of b&w?

There are several occasions where you actually would want to use b&w conversion. For one, if the colors are off and it’s impossible to correct them – convert to b&w. Another case for b&w is blending of shades (highlights and shadows).

In the image below, the father’s shirt was a different color than the sons, the hands were also of a slightly different shade. By leveling the colors we bring out the shapes … and sometimes - that’s what makes an image stand out.

P.S. You are the artist, you create the image, you have the power to exclude details that diminish its strength. Crop.

IMG_9447-vi

Monday, October 13, 2008

Using a remote flash during broad daylight

Why, why would you use a flash in the middle of a bright day? One answer would be to use the flash to fill the subject especially if the model (in this case) is located in the shade but that isn’t the case here (that case will be covered in my next post).

This post is dedicated to creating interesting and vivid effect that force the viewer to engage the picture as one would engage a puzzle. I wanted to create a setting where the eye is capturing a scene that the brain doesn’t consider as ‘normal’ or ‘usual’. As my programmer friends would say “something doesn’t compile”

This picture has the quality I’m describing above. As the model is looking up at the sun (presumably) her face is evenly lit. The unusual element is the shadow inside the umbrella. Read below the image for a technical explanation.

To achieve the following shadow control I chose to use an external flash unit with a remote trigger. The modification I’ve made to my EX580 really came in handy. I’ve positioned the flash about 2 feet of the ground (standing on tripod), pointing at the model from the left. Once the flash was in place, the challenge arouse around getting the correct exposure. I don’t own a light meter hence I had to resort to trial and error. Thankfully, after working with a wonderful photographer Mark Tselner of PhotoFXStudio.com, I’ve learned a thing or two about light control. The trick is to shoot in manual mode (M) and underexpose the subject by about 2 f stops. This will create the drastic shadows behind the model and give us room to create secular highlights to create that 3D effect we aspire to have. Once the exposure was set correctly on the camera, I’ve played around with the power setting on the flash to get the proper light conditions. I ended up using 1/16th power with a head diffuser.

Let me know what you think. Your comments are always welcome.

Friday, July 11, 2008

Reflectors, Strobes and Models

I’ve done some work for my friend today with test shots for several models. I’ve used my 5D with the 2 strobes, an umbrella and a reflector. Can you figure out how light is structured in some of these shots?

IMG_4950

IMG_4883

Let me know what you think.

Saturday, June 28, 2008

Snooping is easy breezy


I’ve spent several hours today setting up my flashes (580EX and 420EX) for a food photography sessions. What I’ve learned is that most objects benefit not only from a shallow depth of field, but also from narrow, beam directed light that I was able to achieve by creating snoop adapters from cardboard. I used 2 flashes for these shots, one on camera for general fill, the other to actually backlight the object. The challenge I was faced with was balancing light patterns in the frontal section of the composition. For this purpose I’ve used a small mirror to reflect the backlight flash back onto the object from the front. The set up is fairly easy but aligning the mirror to get the proper reflection was tougher than I thought. Because there’s no pilot light on my flashes, I had to implore a pen-size LASER mounted to the top of the flash (a small flashlight could also be used) to set the mirror in the proper position (think laser sight for a sniper rifle). I don’t have the picture of the set up but I’m sure you’ve already figured it out.

IMG_4673

Let me know what I think of the results.

Thursday, June 26, 2008

Canon 580 EX HotShoe

As I’m preparing to do a food photoshot for a local restaurant, I’m considering many lighting options. All of them lead to the use of my one or more Canon flashes, alas, none of them have PC connections. This will make it impossible for me to use them off camera. I found this very interesting blog on modifying a Canon 580 EX to include a PC link for remote triggering.

http://blog.rrdphoto.com/2007/04/how-to-add-sync-port-to-canon-580ex.html

Geo Tagging Raw Images

Problem: As we, photographers, have almost crossed into the realm of location aware photo equipment (NOT) it’s easy (NOT) for us to note GEO coordinates of our artwork. You may raise a valid question of “why would I ever need to know the longitude and latitude of my pictures?”. The answer is simple. If your collection is close to mine (over 15,000 images) and you’ve taking pictures across the globe, it may become cumbersome and somewhat challenging pictures you’ve taken in Cairo, Egypt or Woodbury, New York. “Nonsense” you may be aspired to say, “I always tag my pictures in Adobe LightRoom, it only takes 30 seconds”. There’s nothing wrong with tagging your artifacts in your favorite post-processing software but what you’re definitely missing is not only the automation of an error-prone process but the actual GEO coordinates for every picture you’ve taken (http://public.fotki.com/bestnycphoto/weddings/anna-and-ben-wedding/image.html scroll down to the globe sign and select the online mapping software of your choice)

image

Now switch to “Satellite”, zoom in and view and be amazed.

Now, that you’re awed, imagine not having to do anything manually or time consuming to get this detail of information for every picture you take. In addition, the approach I’ll be elaborating on today will also generate a Description tag that will include City, State (where available) and Country for each image. Unfortunately, even though there’s an abundance of GPS Tagging software out there, non is really designed to handle RAW files (*.cr2, *.nef)

Solution: This is a 2 part solution. You need a GPS device with internal memory that will take ‘snapshots’ of your location while you shoot. You will also need software that will match the timecodes from your raw file’s IPTC collection of fields to timecodes on those location snapshots of your GPS device.

The first part is kind of easy, simply order a Data Logger GPS (I personally have this model: AMOD AGL 3080 – it doesn’t have the Bluetooth functionality but I only use it in tandem with my Canon 5D). The beauty of this device is that you don’t need to install any drivers on your computer to use it. You simply connect it via a mini-USB cable and copy the files off of it the same way you’d do it with a USB Key.

The second part is also easy, once the files are on you disk, the right software comes into play. At the time I was doing my research, there was only one FREE software product that would do what what we need with RAW files. That software is GPicSync. Once the software is downloaded and installed, the only optional step left to take is configure the gpicsync.conf file.

I’ve changed the utcoffset=-5 because I live in NY, I’ve also set maxtimedifference=300 to account for pictures I’ve taken before and after the GPS signal has been acquired.

The beauty of this solution is that you update the IPTC fields in your RAW files once (before or after importing them into LightRoom) and all future export to JPEGs will reflect it. These tags will show up in all main photo publishing sites such as fotki.com.

From now on, you’ll never misplace a picture from your trip to Venice, Italy or that quick stop you’ve made in Munich, Germany.